Categories
training

Internal versus external arts

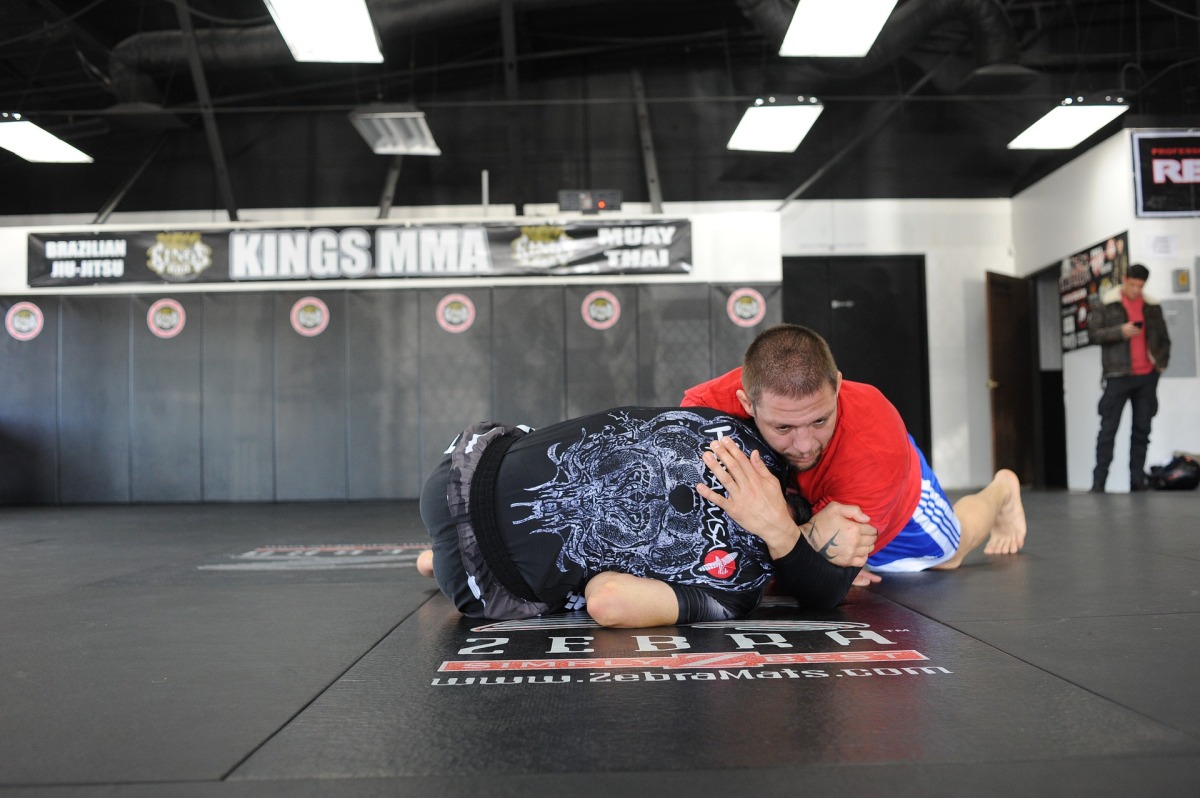
After several decades of training, I’ve explored quite a few arts. They’ve all got elements in common and they’ve all got differences, but there’s one group that takes a fundamentally different approach and it’s worth looking at them to see what we can learn. The traditional Chinese internal arts are taiji, bagua, and xingyi; they’re often taught together, because they take different approaches that can be complementary.

First, let me describe the three arts and their philosophies, and then I’ll talk about why they’re called “internal” and what that means. I’ll start with a parable that Sensei told me when he was explaining the arts:

Three martial arts masters are traveling up a narrow mountain trail, and meet three other men coming the other way. The taiji master says, “I will yield to you my space, you may pass.” The bagua master says, “I will move around your space and we may both pass.” The xingyi master pauses, looks at the man in front of him, and says, “You’re in my space.”

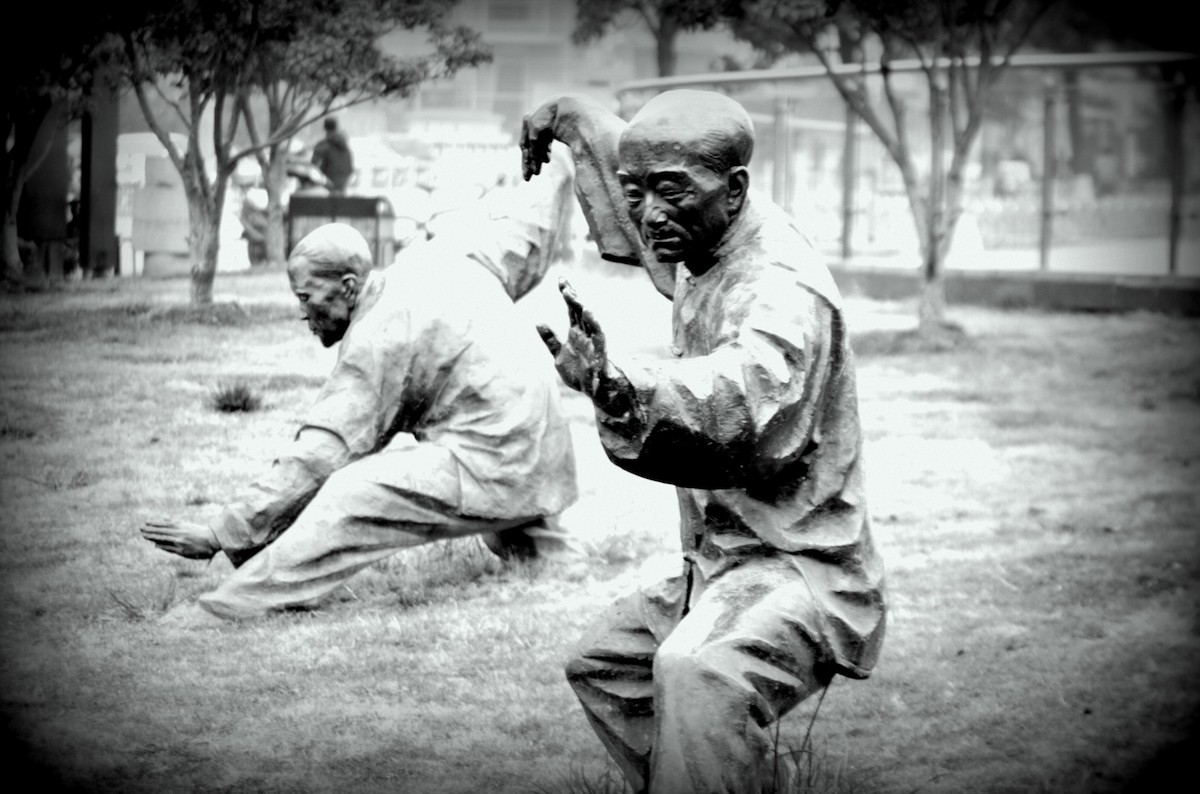
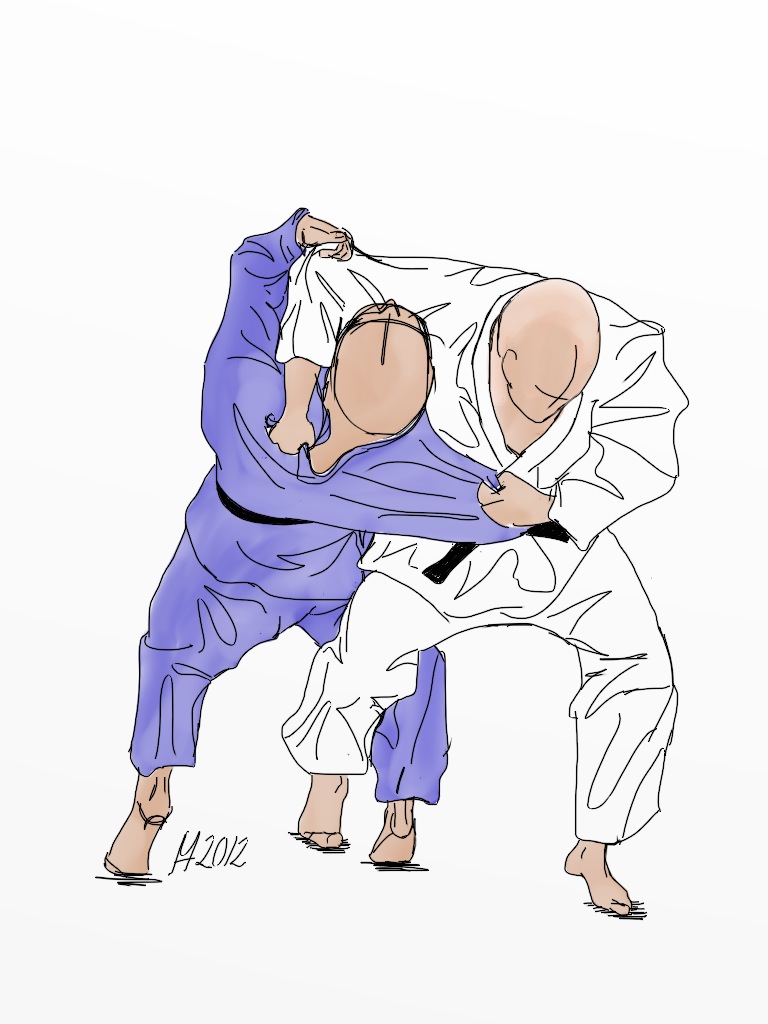
This parable illustrates the different approaches the different arts take. Taiji is well-known for being a “soft” art – it tries to never oppose force, but rather to always yield to it. In the framework of Musashi’s elements, taiji is water – it never resists, but always sticks to you. Taiji operates both in circles and in lines; its yielding nature means that it always has to adapt to what’s happening around it so it can’t be too opinionated. Its stickiness lends itself well to subtle pushes and pulls that take the opponent off balance, and it includes lots of joint locks and takedowns as well as some striking, though those may not be evident to someone watching a taiji set being performed.

Bagua is known for being circular, but in this context that’s not its most interesting characteristic. Bagua’s circles are used to evade and redirect incoming forces – note “redirect” rather than “yield”. Bagua applies its force at angles in order to manipulate the opponent and the situation; it prefers to evade incoming forces or bounce them away rather than yielding to them. The circular motion lends itself to escapes, joint locks, and throws; they’re on the whole much less subtle than taiji’s approaches, though you still may not be able to see them if you watch a practitioner move.

Xingyi is known for being direct, linear, and comparatively “hard”. It concentrates on strikes that use structure and root to create immense focused power. It uses subtle shifts and angles to facilitate deflecting or simply crashing through incoming forces. This description makes it sound less refined than the other two arts, which is not remotely accurate, but it does look simpler if you see someone practicing it. Bagua’s strikes are obvious – what you can’t see is all the tiny adjustments that make them work.

So, what do they all have in common? What makes them “internal” arts? The common aspect of the internal arts is that they focus on taking a relatively small set of techniques and, using excellent body mechanics and approaches, optimizing the hell out of them. Xingyi, for example, has exactly five primary strikes (the “five fists”), and students should expect to spend literally years on each one refining it into its ultimate form.

Without the “excellent body mechanics”, the internal arts are fairly useless for combat – overcomplicated, impractical, and limited. If you take a first-year karate student and put them up against a halfway component opponent, they’ll certainly lose, but they’ll at least look like they’re fighting; if you do the same thing to a first-year taiji student, they won’t have the foggiest idea of what to do, because they’ll have spent all their time perfecting body mechanics and they likely won’t have done any application at all.

There is an often-used metaphor of martial arts as a mountain; this is usually expressed as “different arts are different paths up the mountain, but when you get to the top you end up in the same place.” Compared to the more common “external” arts, internal arts are fundamentally straighter paths up the mountain – they get there in less distance, but the whole path is really steep so your progress may be slow.

In less metaphorical terms, think about your first day of training. If you start practicing, say, kenpo karate, on your first day you’ll be taught a stance or two and probably two or three strikes. The focus will be on getting the gross shape of the movements correct and not on making them really effective – it’s assumed that years of training will be needed before the movements really work. At the end of that day, you’ll be able to punch a bag as if it were an opponent, even though you’d obviously never be effective in a fight.

In your first day of bagua training, you will likely walk in circles. You will be given a great deal of detail on how to walk in circles, but nothing that resembles an application. You’re not only not expected to be able to execute the movements correctly, you’re not expected to even know what to do or why, you’re just expected to do the drills you’re given. You won’t have any idea of how any of this connects to combat or what bagua’s combat applications would even look like.

If you’re training someone to fight and you want them to be effective any time soon, the internal arts are not a great choice. The arts simply aren’t designed to work well in combat for non-experts (this is different from something like aikido, which was never designed to work well in combat at all, even if some experts can make it work anyway).

If your goal is to reach an extremely high level of skill as quickly as possible – understanding that “as quickly as possible” is probably still decades of focused practice – the internal arts are a great choice. The massive foundation required in order to make them work means that when they eventually do work, they work extremely well.

There are also major non-combat applications for the internal arts, and in fact this is the vast majority of their usage today. Taiji, especially, is used for health reasons all over the world. Bagua, with its smooth twisting movements, is also excellent for health; xingyi is less so due to its explosive power, but it’s certainly no worse than any other striking style.

In my opinion, unless you’re really going to go deep on them, internal arts are better positioned as a supplement to other arts. Practicing them has improved my other practice dramatically – it’s given me a far better sense of my body, better structure and root, and a better understanding of how to disrupt other peoples’ structure and root. With all of that, though, I still have no chance of actually applying any of the arts in combat – I just haven’t gone deep enough with them to get all the subtleties that make them really work.

I recommend that every martial artist spend some time with the internal arts if you get a chance. The easiest one is certainly taiji, but finding a martial-focused (as opposed to health-focused) style is challenging, and finding anybody practicing bagua and xingyi is probably unlikely in the US unless you live in a big city. They’re worth seeking out, though – you’ll see big dividends in all of your practice if you invest the effort.

Categories
general

What is mastery?

There’s an image in the media of the “martial arts master”. Saying that probably brought a picture to mind – maybe the stereotypical elderly Chinese man with long moustaches wearing a black or white outfit. People who are not involved in the arts often treat “black belt” and “master” as synonymous, though this is very far from the truth. I’m a black belt and I’ve been teaching for going on two decades, but I make no claims to mastery of anything. So, what does it mean to be a master of something?

Humans have two kinds of memory: declarative and procedural, also called explicit and implicit. Declarative memory is about facts, like “the sky is blue because the atmosphere scatters blue light”. Procedural memory is about movements, like riding a bicycle. When people talk about “muscle memory”, they mean procedural memory – if you’ve ever had the experience of watching your fingers play a song on an instrument when you can’t consciously remember the notes (or executing a kata that you’ve consciously forgotten), you’ve experienced procedural memory in the absence of declarative memory. The whole goal of martial arts, and pretty much all physical skill training, is to get knowledge into procedural memory.

When you first learn a skill, it goes into declarative memory. If I tell you “keep your elbow down when you throw a jab”, your brain records that as a fact. The next time you throw a punch, you have to consciously recall that fact and deliberately modify your movement. Through practice and repetition, you copy it from declarative memory into procedural memory, to the point where your body will just do it without requiring conscious thought. Your whole life is a continuous process of building procedural memory from declarative memory: learning to walk, learning to climb stairs, learning to speak, learning to drive, etc.

Speaking about an individual skill – say, throwing that jab – the first level of mastery is when you’ve built that procedural memory and can actually execute the skill the way you were taught without thinking about it. Before that point, you don’t have the skill, you’re just mimicking what someone else has told you to do. Once you reach this level, you can in principle start teaching other people how to execute the movement, but you won’t be very effective because you won’t have any way to adapt your knowledge to a student’s differences or limitations.

The second level of mastery is when you’ve done it enough to build some procedural-level understanding of why it is the way it is. This comes across as the ability to modify the movement in sound ways, because it “feels wrong” if you do it in unsound ways. At this point, you’ll be able to teach the movement effectively, and you’ll learn a ton by doing so; every time you have to modify it, you’ll learn more about the limits of the movement and how to adapt it to various situations.

The third, and – as far as I know – final, level of mastery is when you’ve honed your understanding to the point where the movement “goes away” and becomes integrated into some fundamental principle. When I say “it’s just a step”, this is what I’m getting at: at some point in your swordwork training, cuts stop being cuts and just become an aspect of moving your body. At this level, teaching becomes simultaneously easier and harder; easier because you have a deeper understanding and can more easily modify movements, but harder (for me, at least) because you have to resist the temptation to express things in terms of theory that students won’t understand anyway.

All that was talking about individual movements and techniques, but nobody says “that guy is a master of kesagiri“. What does it mean to master a weapon, or a style? Most styles include a vast array of techniques in their curriculum; as time goes on, various teachers add things that they have found effective, but rarely are things removed, so you end up with a grab-bag of possibilities.

As an example, consider the case where you are at a weapon disadvantage (maybe the opponent has a sword and you have a knife, or nothing at all). In Suisha Ryu, you have various options for dealing with this situation: you can jam an attack, you can try to disarm them, you can move in and try infighting, or even take them down. They’re all valid, and there are reasons to choose one or another in various specific circumstances, but fundamentally it comes down to which ones you’re the most comfortable with. Personally, I would jam and then go for a takedown (with strikes, of course!). I wouldn’t try disarming unless we ended up in a wrestling match, and I wouldn’t try infighting when at a weapon disadvantage. Other people, with different backgrounds and different physical abilities, would make different choices, and they’d be just as correct.

A master of a style, then, is someone who has mastered a sufficiently large subset of that style’s techniques so as to have an answer to any situation that they find themselves in. It doesn’t matter whether you can execute twelve different punches as long as you can punch effectively from any angle you need. You don’t need to know seventeen ways to disarm someone, you just need to be able to make one work in your situation.

If you’re not a teacher, once you reach this point you can throw away all the stuff you don’t choose to use if you want to. If you teach, of course you need to reach at least the second level of mastery on the whole curriculum so that you can explain the techniques effectively to your students and they can make their own choices of which subset of techniques work for them.

How can you tell if somebody is really a master? Well, short of watching them in a real fight, you can’t. A rule of thumb that I go by, though – anybody who calls themselves “master” probably isn’t, or at least isn’t somebody I want to learn from.

Categories
empty hand

Throws and takedowns

The words “throw” and “takedown” are often used interchangeably, but in my lexicon they refer to related but separate concepts. Understand that this is my conceptual framework – I’m not claiming any sort of fundamental truth to it. When I use the term, a “throw” indicates a movement where tori is momentarily bearing uke‘s weight in order to unbalance them. A “takedown”, by comparison, involves breaking uke‘s structure such that it can no longer support them, but does not involve bearing their weight.

This division is useful mainly because throws are harder to pull off than takedowns. Most of the time, uke needs to make a mistake in order to be thrown, while takedowns can be done in many different ways. Throws also always require tori to enter into uke‘s space, while takedowns often do not.

I’m not really a fan of throws; they require you to tie yourself into uke‘s center, during which time you’re pretty well stuck if they’ve got friends. Takedowns, on the other hand, offer a lot more flexibility in terms of positioning, and there are usually multiple versions that can be done from any situation.

Throws

All that said, I’m going to start with throws because there are just fewer variations of them. Mechanically, all throws are fundamentally the same: you position some part of your body against uke‘s center, then you lever them over that fulcrum, lifting to break their connection with the ground. During this movement, you momentarily support their weight, so the fulcrum must have enough structure to withstand that.

There are tons of minor variations, so I’ll just pick a couple of illustrative examples here. First, the classic hip throw, which judo calls O Goshi:

You place the back of your pelvis, somewhere between your center and the hip of your post leg, against uke‘s center (front or back, either will work). You take some handle on their upper body – classically, it’s an arm around their torso, but it can be done from almost any grip – and use it to bend them over the fulcrum. This lets you use your legs to lift them off the ground and lever them forward, dropping them on the ground in front of you.

For the other example, I’ll take something a bit more outré – what judoka would call Tomoe Nage, though I was taught it as “wheel throw” (that terminology is going to make lots of judoka very angry – sorry, talk to Sensei):

This is a type of “sacrifice throw” (there are also sacrifice takedowns), where tori chooses to fall in order to throw uke. Tori grips uke‘s upper body and falls backward, planting one foot in uke‘s center. This provides the fulcrum, with the extra benefit of adding tori‘s momentum to uke‘s.

Note that in both cases, there’s a moment where tori is supporting uke‘s weight, and at that moment tori is pinned and unable to move. The sacrifice throw is worse, because tori is not only pinned but actually on the ground; from a combat mindset, this is a fairly terrible movement and not something you’d ever do by choice.

As I said above, there are tons of variations. The fulcrum can be your hip, the center of your pelvis, one or both shoulders, your knee, or even your foot as above. The lifting point is always uke‘s center, but it can be from the front or the back or even the side if you get them positioned correctly.

Takedowns

Takedowns, by contrast, are much more flexible. There are two large categories of takedowns: the first kind moves uke‘s center beyond their base, and the second kind breaks uke‘s base to the point where it can no longer support them.

In the first type, you’re fundamentally just pushing or pulling on some part of uke‘s body. There are two counters to this: uke can either simply structure up and resist the pull or push, or they can step along with the force in order to move their base. Most people will do both of these things reflexively, so any effective takedown needs to prevent both counters.

The way around resistance is to push or pull on a part of the body that can’t easily resist. If you can get ahold of it, uke‘s head makes an excellent handle, because it’s very difficult to support the head with body structure. Another option is to use a joint lock to establish a handle on the body that’s disconnected from its structure – for example, if you can take a straight arm bar with the elbow locked out, a push on the back of the arm will necessarily move the body. Either of those options have the effect of breaking uke‘s balance. Once off-balance, they are disconnected from the ground and have little ability to resist any force applied to them.

There are other ways to break someone’s balance. The easiest way is to simply hit them; this is sometimes, a bit sarcastically, called a “striking takedown” – you just hit them until they fall down on their own. See the last section of this post for more about this. There are also subtler ways to break balance; for example, many takedowns start by making hip-to-hip contact, where a fairly small force applied can break the connection between uke’s upper and lower body.

Once you’ve forced uke to move, you still usually need to prevent them from stepping along with the force. This normally takes the form of immobilizing one or both legs. This can be as simple as stepping on uke‘s toes as you push, but usually it involves putting something in the way of one or both of their legs (this is sometimes called “sealing” the legs).

An example of this type of takedown is the “necktie” takedown:

In this technique, tori places their leg behind one or both of uke‘s legs and then pushes uke‘s head over the blocking leg (there are a few positions in which this can be done, but the fundamentals are the same in all cases).

Another example of this category is the takedown that aikido calls kotegaeshi:

It’s an inside wrist lock, meaning that tori is rotating uke‘s hand from palm down to palm up and then beyond. Due to the angle of the force, this has the nice characteristic that, done correctly, it’s very hard to step with. In an effort to relieve the pressure on their wrist, uke will normally fling themselves over backwards and take a fairly hard fall.

Instead of extending uke‘s balance beyond their base, tori can break uke‘s base until it can no longer support them. There are, again, many ways to accomplish this (this is part of why I prefer takedowns to throws). The simplest might be to just kick uke‘s leg. A kick to the knee will put most people on the ground, and can be done very quickly without tying up your hands at all.

The classic “reaping step”, of which judo has many variations, falls into this category. This looks a lot like the “necktie”, but rather than pushing their head over your leg, you instead use your leg to strike uke‘s leg out from under them while immobilizing their upper body with your arms. To make this more concrete, let’s look at O Soto Gari, the “major outer reap” (this is also the header image for the post):

There are also a set of joint locks that can be performed at the hip, knee, and ankle. An example of this is the knee pull:

In this technique, tori grabs uke‘s knee (usually because tori is on their knees themselves) and pulls it forward and to the side. Knees are not good at supporting this type of force and so generally buckle, resulting in the whole body coming down. This is usually an example of a sacrifice takedown, since tori needs to already be very low in order to execute the takedown.

My personal favorite in this category is a simple stomp on the back of the knee. This requires that you get close and slightly to one side of the opponent, but once there it’s easy to execute and it has the nice benefit of turning them away from you as they go down.

Striking

The “dirty secret” of throws and takedowns: in general, they don’t work if you don’t strike first. Other than so-called striking takedowns, most takedowns (and all throws) require some manipulation of uke‘s body structure, and that’s generally very difficult while they’re sticking their thumbs in your eye sockets. Even if they’re not hitting you, many of the techniques can be resisted by simple strength if uke is prepared.

There’s a standard demo I do with my students when we’re working on disarms, but this applies to takedowns as well. I set up a disarm, warn the student that I’m going to do it, and tell them to resist. Unless I’m much stronger than they are, they can usually prevent me from taking away their sword. I release the pressure for an instant and, with my other hand, tap them lightly on the forehead. Once their attention is distracted, even by that trivial thing, I can easily take their sword away.

This is a flaw in the way many grappling arts are taught – many of them ignore striking (atemi) entirely, and even those that are combat-oriented tend to only wave their hands at the idea. In part, this is practicality – you can’t easily and safely simulate the effect of being hit in training, so you just pretend it’s happened and ask your training partners to comply. It does tend to create bad habits, however, and elevates the perceived effectiveness of grappling arts among people who don’t do MMA-style training that involves actually getting hit.

The most important thing about training throws and takedowns, as with most techniques, is to start slow but build up to working with a resistant partner. If you never execute the technique in a somewhat-realistic scenario, you’ll never understand what it takes to really make it work.

Categories
general movement

Simple momentum vs. continuous force

Here’s a thing you’ll hear a lot: kinetic energy is mass times velocity squared, so if you can get more mass into your strikes then you’ll have more power. By moving your body into your strike, you have more mass behind the strike. Seems self-evident, right? I actually used this one myself in a lesson just last week, and it’s certainly true, but it’s not the whole story.

Another perspective: when I teach my students how to punch, I normally explain it as establishing structure through your arm and then hitting the back of that structure with your body. I teach it that way in order to make it clear that you need to move your arm before your body, reach full extension at the moment of impact, and that (most of) the power in the strike is coming from your body and not your arm. This is also not the whole story.

If you were leaping into your strike with a rigid arm, the kinetic-energy explanation would be correct. At that point, you’re effectively a thrown brick, and you’re going to deliver precisely mv2 joules of energy. Things aren’t as simple as that in a real strike, though, because your muscles are continuing to generate force up to and even after the moment of impact.

To take a counterexample, consider a simple push. There’s no particular kinetic energy going on here; you’re moving slowly and your body is relatively stationary. You can still generate quite a lot of force, though, by pressing continuously against the target and balancing that force with a push into the ground.

There’s an intermediate stage as well: picture jumping straight up, and at the peak of your leap pushing horizontally against a target. In this case, you’re not pressing into the ground and your kinetic energy isn’t contributing to the push; it’s the inertia of your body plus the energy of your muscles that combine to create net force.

A real strike is a combination of all of these. Thinking about a simple straight punch, you generate force with your muscles into the ground, which moves your body forward. You generate more force into your arm. At the moment of impact, the energy delivered is your body’s kinetic energy plus the “push” through your arm, supported by your body’s inertia plus an additional push into the ground.

Losing any one of these components means that your strikes won’t have the power they need (see my previous post on the principles of power). If you don’t move forward, you lose out on the mass of your body in the kinetic-energy calculation. If you don’t generate power through your arm – i.e., hitting with a rigid arm – you’re losing out on that component. If you don’t simultaneously press into the ground, the power in your arm will go towards pushing your body away from your target rather than delivering that energy where you want it.

The tl;dr here (too late, I know) is “striking is complicated”. You start out by standing still and punching with your arm, and then you layer all these other factors on top over the course of your training. When you start considering strikes more complex than a linear punch – say, a sword cut – it gets even worse, since you’re having to generate power and body movement along lines that aren’t necessarily obvious or convenient. As Mushashi is so fond of saying, “you must think deeply on this.”

Categories
kenjutsu weapons

Sojutsu

One of the weapons practiced in my style is the yari, the Japanese spear (technically, the suyari, the straight spear, as opposed to any of the many other variations of yari). Our bo style is actually derived directly from the yari, meaning that our staff work looks a bit strange when compared with a style that’s designed specifically for the staff. In this post, I’m going to talk about the way Japanese spears work and how the Suisha Ryu uses one.

The suyari looks like the image at the top of the post. It has a long, straight, double-edged blade. Sometimes the blade is flat, but often it is triangular with a pronounced “belly” on one side and a fuller (groove) on the other – this makes it much stronger without adding a lot of extra weight. The interesting thing about this design when compared to your average European spear is that it has two effective sharpened edges in addition to the point, so it can be used for massive slashing strikes as well as for thrusts. (Note on terminology: a spear thrust is properly referred to as tsuki, but that causes confusion with the sword technique so I normally use the English instead.)

That said, the advantage of a spear over most other weapons is its reach, and maximum reach is achieved when you’re using the point. If you watch someone practicing sojutsu, you’ll see them doing lots of spinning and cutting movements, but fundamentally what you want to do, almost all the time, is thrust. Ideally, I’d like to keep my opponent a good six to nine feet away from me (or farther depending on the length of my spear; the ones we normally use in Suisha Ryu are on the short side for yari, roughly seven feet including the blade) at all times. At that range, I can stab them with the spear point, and unless they also have a spear or a polearm of some sort there’s nothing they can do to me.

The spear itself is normally held with the left hand over the wielder’s head, the right hand extended forward, and the spear sloping down with the point around waist level. This position places the spear in front of the wielder as a “shield” – small movements to one side or the other can deflect direct attacks as from another spear or a long tsuki with a sword. The wielder’s left hand is at the butt of the spear, and their right hand is as far forward as possible; this gives the wielder the maximum possible control over the spear. It also yields the minimum length sticking out in front to be used by the opponent to manipulate your spear, and the maximum space between the hands for parrying.

The thrusting motion brings the left hand down in an arc close to the body and past the wielder’s left hip and then out in front to the center line. The right hand aims the spear; if done correctly, the point of the spear will travel in a more or less straight line from its initial position to its target. You specifically want to avoid hooking the point to the side, which commonly happens because people push their left hand away from their body as they bring it downward; this creates a half-circle movement of the point that makes aiming very difficult, though this motion can be used as a parry.

Like all “secondary” weapons in the Suisha Ryu, we normally think about using the spear against a sword, though there are spear-vs.-spear techniques as well. A fight of spear against sword, or any shorter weapon, comes down to a battle of range. The spear wielder wants to keep the opponent at maximum range; the sword wielder needs to close to within sword range, which requires them to pass the point of the spear.

Spear thrusts, done correctly, are very quick. The spear jabs out to full extension and then whips instantly back to guard. The swordsman wants to be closer to the spearman than the tip of the spear, so it’s critical that the recovery be as fast as possible – in particular, it must be faster than the opponent can cover the space, so that by the time they get there the point of the spear is waiting for them.

OK, so that’s a lot of talk about thrusts, and it’s deserved – if you’re doing it right, thrusts should be close to 100% of your techniques in practice. What about all that spinning and cutting stuff, though? What’s that for?

First, to illustrate the kind of thing I’m talking about, check out this video. It’s not an accurate representation of Suisha Ryu sojutsu, but it illustrates a lot of what I’m talking about here. The practitioner is a little bit more enthusiastic about using the spinning motions than I think they ideally should be – they’re creating a lot of openings by reversing the spear in cases where they could just stab – but I’m guessing that a lot of that is just for demonstration purposes. At about 1:05 you can see an example of a guard similar to the one I’m describing, though theirs is held to the side and ours is on the center line. That’s a reasonable compromise, especially against a sword – it makes thrusting easier and quicker, at the expense of some of your defensive ability.

Basically, there are two cases where you’d want to do something other than just thrust: an opponent who’s too close, or multiple opponents. Looking at the second case first, big sweeping motions are good for clearing space around you. If you hold the spear near the butt and sweep it through a full circle, most sane people will get the hell out of the way. It’s best to keep the point low while you do this, because that makes it harder to block – you really don’t want that sweep to be stopped in the middle, or you’ll lose control of your spear.

More interesting is the case of an opponent who’s too close. If you keep your guard as described above, you can still thrust even at a fairly close target, but it’s not very effective because the thrusting motion doesn’t really generate power until the last third or so. Also, the thrusting motion is fairly predictable, so if you’re one-on-one and at a range where you’re in danger, it’s not a great option.

In this case, you’re better off using the spear more like a staff – this is why Suisha Ryu’s bojutsu techniques overlap so heavily with sojutsu, and also why we tend to use fairly short spears. You can strike with both ends of the spear just like a staff, you can thrust with both ends (though one is obviously more effective), and you can perform sweeping motions from the middle that cover one side of you.

I’m not going to try to describe all the possible movements in detail, but the idea is to keep the spear in motion at all times so that it’s hard to predict. When you’ve got two ends to strike with and the spear is constantly moving, it’s very hard to tell which way that strike will be coming from. When one of those ends has a foot-long blade on it, there’s a really strong incentive not to take a hit, so most people will respond by backing up – which is exactly what the spear wielder wants. The whole goal at this point is to re-establish safe distance so that we can go back to just poking at them until they make a mistake.

A side note here: the trickiest bit about the various slashing and spinning movements is maintaining blade alignment. Some spears historically had oblong or otherwise non-round shafts to provide some indexing, but many did not. When you’re using these movements, one hand or the other will be “driving”, and the trick is for that hand to stay parallel with the flat of the blade. Sometimes, such as during a thrust, one hand (usually the left) will be driving and the other will just guide loosely – in this case, the left hand is indexed to the blade and the right hand is not. At the end of the movement, you need to make sure your hands are parallel (for a thrust, both hands will be palm-up) so that you can switch the indexed hand without having to reposition. This takes quite a lot of practice.

Historically, spears were often the primary weapon of the samurai on a battlefield. Swords were more of a sidearm – there if you need them, but not your first choice. For any art that claims to have applicability to a battlefield, sojutsu (or possibly naginatajutsu) is a necessary component if you want to be a complete system.

Categories
general weapons

You have two hands

Scenario: you have a knife and you’re in a fight. Somebody grabs your knife hand. What do you do?

If you’re like most people, your immediate focus is to free your knife. The unsophisticated reflex is to try to use your other hand to pry the grab free; the trained reflex might be some form of grab-escape technique, like a wrist lock.

While you’re doing that, what are you not doing? Well, you’re not striking. You’re not improving your position. You’re not making any progress towards winning the fight, all you’re doing is trying to recover the status quo.

When someone has a weapon, they tend to get very focused on the weapon. The weapon is usually by far the most powerful tool available, and so it certainly makes sense to prioritize it. In combat you don’t have very much attention to spare, however, and in the process of prioritizing the weapon people often neglect the rest of their available weapons.

When someone grabs your wrist or hand, think about what they’ve done – they’ve established a mechanical connection between their body and yours. They’ve used one of their hands (or, if you’re really lucky, both of their hands) to immobilize one of your hands. This is exactly the same thing that would happen if you grabbed them instead: you’d establish more or less the same mechanical connection, and you’d remove the same set of weapons from the fight.

Now, they presumably chose their trade in a way that seemed advantageous: if they grab your knife hand with their empty hand, that’s a win for them. All they’ve done, though, is to remove your advantage and brought the fight to an equal plane – they haven’t gained an advantage of their own.

I mentioned grab-escape techniques above, and I was thinking about, for example, turning your wrist through their fingers, locking their wrist, peeling a finger, all of that sort of thing that always gets taught in self-defense classes. That’s all fine, but it doesn’t accomplish anything other than escaping the grab. Turns out, breaking someone’s nose will usually also make them let go, and as a side effect now they have a broken nose. In the words of literally every teacher I’ve ever had: “if you can just hit them, just hit them.”

If they do something like grab your shirt, that’s even better: they’ve taken away one of their weapons in exchange for none of yours. By all means, please hang onto my shirt, I’d be delighted to use my free hand to hit you until you decide it was a bad idea. You presumably grabbed me with the intention of pushing or pulling me, but if my structure is good, nothing stops me from moving you instead.

So, how do you train this? The reflex to fight the grab is a strong one, and it takes practice to respond with offense instead of trying to escape. The first step is just to practice using multiple weapons (punches, kicks, headbutts, grabs, throws, etc.) This can be a bit counterintuitive – “I have a sword, why am I kicking them in the shins?” By doing this, however, if your sword is unavailable for whatever reason you’ll more easily and automatically fall back on your other weapons without that tunnel vision. It’s also never a bad thing to introduce some secondary strikes into your attacks – as a distraction, if nothing else.

Once you’ve done that, then you can train for the grab itself. Ideally you’d do this with a partner, of course, but failing that you can hold a weapon in your primary hand as if had been grabbed and then work through responses. Hit the attacker several times with whatever weapons appeal to you and then break the grab and use the weapon to finish them. Odds are that if you’ve hit them effectively, you won’t need to break the grab, they’ll let go on their own.

You can also practice attacking the grab itself. This is a bit different from trying to escape from the grab, because the goal here is to damage the limb that’s holding you. Elbow breaks, wrist locks, finger breaks, muscle-body strikes, nerve strikes, they’re all options. By the way, I’m not a big fan of nerve strikes in general because they’re really difficult to pull off at speed, but they’re a whole lot easier when the limb you’re hitting is attached to your own body! Attacking the grab may or may not make it let go, but the damage done will stick after it does let go so at least you’re making progress.

Having a weapon is a powerful advantage in a fight; that’s why there have been so few people throughout history who voluntarily went into battle unarmed. That said, it’s important not to let your weapon become a weak spot by over-emphasizing it.

Categories
general training

Training multiple arts

There’s a famous quote from Bruce Lee: “I fear not the man who has practiced 10,000 kicks once, but I fear the man who has practiced one kick 10,000 times.” The common wisdom in martial arts is that it’s better to dive deeply into a single art than to skim the surface of multiple arts. That said, life is messy. I’ve personally trained no fewer than ten different arts (kenpo, aikido, kenjutsu, Destreza, xingyi, bagua, taiji, yichuan, kung fu, escrima), and that’s not even counting subtler distinctions like the different flavors of aikido or taiji.

I didn’t set out to collect a whole bunch of arts, stuff just happened: I studied karate as a kid like so many people do, then I did aikido while I was in college. After I started training kenjutsu and Destreza with Sensei, he decided he wanted all of his students to cross-train in a bunch of arts he knew, then he got in a motorcycle accident and stopped teaching. I trained kung fu for a few years, then I moved to Pittsburgh for a job and started training escrima here.

Is that “good”? Well, yes and no, there are advantages and disadvantages. I’d say, though, it’s probably pretty normal for a serious practitioner – the days when somebody can go live on a mountaintop and train one art for eight hours a day their entire life are largely gone. So, given that this is probably unavoidable for most modern practitioners, it seems reasonable to look at how one should go about training multiple arts.

Ego

One thing every teacher hates to hear from a new student is “that’s not the way we did it in my last school.” Different people do specific things differently; sometimes it’s a matter of taste, sometimes it’s what works for the specific person. If you ask me why I do something a particular way, I’ll give you an explanation, but that doesn’t mean it’s the only way to do it, just the one that I’ve found best for me. When you come to a new school, a new style, or a new teacher, it’s absolutely critical to leave your ego at the door. You may be hot stuff in your previous art, but there are reasons why your new teacher is telling you to do something, and you may not have enough experience to understand them properly.

An example: Sensei taught us all circular structure. Elbows were always out, in the “hugging a barrel” position. When I came to Sifu’s school and started training kung fu, he wanted me to put my elbows down by my sides. I thought “this is wrong, this isn’t structure”, but I did it anyway because that’s what Sifu was telling me. Now, with more experience, I understand that circular structure is excellent for exerting power on an arc or to the side, and it’s adequate for exerting power straight forward, but it’s not optimal – if what you want is specifically linear power, you’re better off with your elbows down.

Another example: I first studied escrima with Doug Marcaida (though he uses the name kali). I stayed with him for only a few months before deciding that what he was doing wasn’t what I needed at that time, but I learned a few things in the process. Years later, I came to my current escrima school, and I mentioned that Doug had wanted me to hold my sticks close to the end, with very little punyo (the butt end of the stick) sticking out. Doug’s explanation for this was that it makes it harder for you be disarmed – and he’s right – so I asked my current teacher why he did things differently, with two or three inches of punyo. My teacher said “does Doug use knives?” The reason I was given (there may be others that I’m not aware of yet…) for leaving punyo sticking out is that it behaves like a knife held in what Pekiti Tersia escrima calls a “pakal grip”, with the blade edge along your forearm. By holding the stick in what might be considered a suboptimal position, they’re creating greater crossover between the aspects of the art.

Asking questions is good, but don’t assume you know what the right answers are. If the answer doesn’t agree with your preconceptions, throw away your preconceptions and do what you’re told, and have faith that it will make sense eventually.

Principles

Different arts are based on different principles, but there are only so many ways to move a human body: structure, root, balance, distance, and timing are universal. It’s important to understand the principles of the art you’re practicing and use them appropriately, but it’s impossible to keep the principles of one art from bleeding over into all the others if you’ve internalized them properly, and it’s usually not important or even desirable to do so.

If you’ve learned to step in balance, your movement is going to be improved no matter what style of movement you’re using. If your art wants you to leap, you won’t be able to do that in static balance, but that doesn’t mean you can’t start and end in balance. If you’ve learned to maintain structure in your body, that will serve you well no matter what movement you’re making.

That said, you do have to understand the needs of your art. If you’re using a yari (spear), it’s critical to move with the weapon – it’s so heavy and unbalanced that it’s effectively impossible to muscle it around, all you can do is steer it. You need to understand how your body structure interacts with the weapon, how to guide the weapon into the movements that you want, and how to stay out of the way once you do. If you’re using a knife and you try to apply those principles, you’re going to have a bad time; the knife is so light and fast that it doesn’t have any momentum to speak of, and you have no real choice but to muscle it around.

When I studied kali with Doug, he was always telling me I had too much body movement, because I was trying to make my sticks behave like a sword. Using the katana in my style is closer to the yari – it’s relatively heavy, and it’s important to understand how to guide that mass rather than fighting it. Sticks are closer to knives; they’re too light for that kind of thing to work, and if you try to generate all kinds of power in your body all you’ll do is slow yourself down and reduce your effectiveness.

If you go from Muay Thai to taekwondo, you’ll run into a similar problem: both of them use kicks as a primary weapon, but they’re so different that translating principles between them is going to leave you in a bad place. At some point you have to understand when to treat what you’re doing as a new and different thing and forget what you know; after you’ve studied it for a while and understand it in itself, then you can try to synthesize it into your existing knowledge base.

Techniques

Again, there are only so many ways to move the human body, so lots of arts have similar techniques. You’ll find straight and hook punches in every art that punches; front, side, and round kicks in every art that kicks; inside and outside wrist locks, straight arm bars, and hammerlocks in every art that includes joint locks.

Once you understand how to do these techniques, they’ll largely translate from one art to another – but only largely. Every art has its own subtleties – round kicks in most arts chamber the leg horizontally, for example, but in Wan Yi Chuan kung fu the chamber is the same for every kick and the change in direction happens only as the kick is launched. My kung fu steps end with the rear heel raised for more forward power, but escrima wants me to leave that foot flat for maximum mobility.

In general, it’s best to try to forget all your previous techniques when entering a new art. If you go in with a “beginner’s mind”, assuming you know nothing, then you’ll learn the techniques as they’re intended. If you go in thinking you’re an expert, your techniques will always be a little bit off from the perspective of the art you’re practicing. Again, once you’ve learned and internalized them in their proper context, then you can start trying to synthesize them with your previous arts.

Synthesis

Eventually, of course, you need to put things together. When I spar, unless I’m specifically trying to fit myself into the mode of a single art, I use bits and pieces of all of my arts. I throw round kicks and vertical straight punches in the kung fu style and hook punches like a boxer. I step like I’m doing kung fu, I use heavy weapons like a bugei (practitioner of budo, a Japanese martial artist) and light weapons like an escrimador (practitioner of escrima).

Did I plan all of that? No, of course not. Each technique comes out the way I was trained in one of my arts, whichever one I’ve internalized the best. I hope that I’ve chosen the best parts of each of my arts, but probably it’s just the most comfortable parts. As long as they form a cohesive art in practice, I’m happy with how it came out, and I’ll keep polishing it together.

If training multiple arts is unavoidable, the best thing you can do is to maximize the advantages of having multiple perspectives and minimize the downsides of having less depth in each art. Just understand your own limitations, and don’t think that you’re going to know as much about any of your arts as someone who has focused entirely on that style.

Categories
general

Groundwork in Combat

Let me start with a disclaimer: I suck at groundwork. Sensei was of the opinion that if you end up on the ground, you should focus on standing up as quickly as possible, so we did basic escapes and not much else. Sifu did some groundwork, but it was very much not the focus. It’s also almost entirely unrelated to everything else; different weapons are at least philosophically similar, weapons arts aren’t that different from striking arts, and striking arts blend fairly seamlessly into standing grappling, but ground grappling is a whole different beast.

That said, I’m working on it, because groundwork has its place in combat. However, in my opinion the way most people train groundwork is not particularly useful for combat applications. This isn’t unique to groundwork – a lot of martial training is oriented towards tournaments, exhibitions, etc. There’s nothing wrong with that, as long as you’re aware what you’re training for and you’re not kidding yourself that it’ll work in a bar fight.

Let me be a bit more concrete about that. Combat is a chaotic, fluid situation where your primary goal needs to be to preserve your own life and well-being. The way groundwork is often taught, especially in arts such as BJJ, focuses primarily on taking a dominant position where you can control your opponent. That’s OK in a one-on-one match under controlled conditions, but if you’re worried about the guy in the corner of the bar possibly breaking a bottle on your head, taking a cross-body control position is a bad, bad idea. If you’re concerned about the potential for broken furniture on the ground, rolling to your back in order to establish a guard isn’t a good plan.

In the context of a combat situation, the goals of groundwork should be, in descending order of priority:

  1. Protect yourself from the person you’re on the ground with
  2. Protect yourself from everybody else
  3. Get away and get back to your feet

Note what’s not in that list: controlling or hurting the opponent. If I’m safe and can escape to standing, I don’t particularly care what my opponent of the moment is doing. If I get a chance to do something that might keep them from getting back in the fight I certainly will, but I’m at such a tremendous disadvantage on the ground that standing has to take priority over everything but safety.

OK, so let’s say you buy that prioritization. What does that mean? First, obviously you need to keep your opponent from striking you. This is a central part of every ground art, but in a lot of tournament-focused training it’s often glossed over or even ignored. If your opponent is in a top mount and you reach up to grab them, you’d better be aware of the chance that you’ll get punched in the face before you can control their torso. If you put two hands on one of theirs, you need to worry about what their other hand might be doing. If their hands are on your chest, it’s not OK to assume that they aren’t going to choke you while you’re jockeying for position.

Next, you need to stay aware of your surroundings. Even if you have your opponent’s hands tied up and you’re in a safe position, if you can’t see you’ll be vulnerable to attack by someone else. Even if you can see, you need to be prepared to defend yourself. If possible (and this is often a tall order), it’s best to avoid committing both hands to your opponent so that you have something to defend yourself with. If you can place yourself next to a wall, a piece of furniture, or some other obstruction, this may help to protect you from at least that side.

Finally, you need to get away and stand up. Escapes are a big part of every ground art so I’m not going to go into the technical details here, but it’s important to think about what happens in the moment after the escape. When you stand, you need to keep your feet away from the opponent on the ground, or you risk getting pulled right down again. The instant you can, you need to free your hands and step away so that you can establish mobility and defense against any other opponents. Staying fixated on the opponent on the ground – who is probably the least dangerous person in the room at that moment – is hazardous and likely to make you miss other threats.

I’ll say one more time, I’m not criticizing arts like BJJ here. If you’re training to win tournaments, then by all means you should optimize your art for tournaments. Where I have an issue is when practitioners of tournament-focused arts such as BJJ, kendo, and (most) tae kwon do make claims about the combat effectiveness of their arts. Yes, certainly parts of those arts will be combat-effective, but if you’re not training them in the context of combat you won’t be able to apply them effectively when you need to.

Categories
movement training

Body Structure

I’ve been putting this one off because it’s an extraordinarily complex and subtle topic and I wasn’t sure how to describe it properly, but here goes. I’ve touched on this a bunch of times, but I don’t think I’ve ever done a single post about the whole concept of structure.

Structure is a general term describing how resistant your joints are to being moved by external pressure. It’s not (directly) about resisting your body being moved – the best structure in the world won’t keep you from sliding on a slippery surface or from being simply picked up off the ground. There are ways to do those things, and they involve structure, but that’s outside the scope of this post.

Note that structure is not achieved by tensing your muscles to rigidity. You can resist movement by tensing your muscles (and it’s what everybody tries first), but this approach has a whole bunch of problems:

  • Tensing your muscles prevents you from moving when you want to, which makes it fairly useless.
  • You can’t keep your muscles at maximum tension for very long.
  • Tensed muscles are bad at transferring stress smoothly to other parts of your body, so you’ll find that some other joint will be overloaded and fail instead.
  • It’s “brittle” – by using maximum tension, any additional force will cause a complete failure rather than a smooth compression.

Let’s start with a single joint to illustrate the principles; I’ll use the elbow, because it’s the simplest joint we usually care about. Your arm is effectively two rigid segments connected by a simple hinge. If you want to prevent your arm from bending, most people will tense their tricep and bicep to make the arm rigid. This has all the problems laid out above: you can’t move your arm, you can’t do it for very long, pressure on your arm will tend to make your shoulder or hip move instead, and when it fails your arm buckles entirely.

Instead, you can establish structure by creating light tension through your tricep and countering that with light tension in your bicep. This feels like “expanding” your arm, like it’s on the surface of a bubble that’s growing. You’re just “taking up the slack” in your tissues here, so there’s no looseness in the joint. Horseback riders talk about “riding in contact”, meaning that you should have just enough tension in the reins to feel what the horse is doing but not enough to actually pull on the horse’s mouth – that’s the kind of thing that you’re doing here with your muscles.

Having done this correctly, force applied to your arm that would normally bend your elbow will instead transfer down the bones of your arm into your torso. Bones don’t get tired and can support a lot more stress than soft tissues, so this makes it a lot easier to resist an incoming force. Since there’s some elasticity to your tissues, your elbow will bend a bit, but in a springy way; if the pressure disappears, your arm will return to its original position without you doing anything. Because the resistance is coming from elasticity rather than muscle, it gets stronger as your elbow bends, and the force is transferred in a smooth way to your shoulder and torso.

One important note here: this only works when your elbow is within a specific range of angles. If you lock your elbow straight, you can’t apply enough tension in your tricep to establish structure before you start to stress the muscle unsustainably. If you bend your elbow more than about 90 degrees, you change the angle of the force in a way that prevents your bones from transferring it to your torso – instead, the force goes across your bones and directly into your muscle, which is what we were trying to avoid. In general, all joints work best in the middle of their range of movement, and get weaker towards the ends of the range.

You can experiment with this specific case fairly easily: put the back of your hand on a wall with your elbow bent and lean some weight onto it. Envision holding yourself away from the wall by reaching through it rather than by locking down your muscles. Now, try changing the angle of your elbow. You’ll find that as your elbow bends more, it gets progressively harder to maintain your structure, putting more and more stress on your tricep. In this example, straightening your elbow will make it easier as more force transfers from your muscle to your bones, but you can feel the loss of “spring” in your shoulder.

OK, so much for a single joint. How does this generalize to your whole body? Shoulders and hips, in particular, are ball joints with much more complex attachments than elbows. Thankfully, the principles here largely don’t change – keep the joint in the middle of its range, apply light tension just to keep “contact” in the same way you did with your elbow. Again, this feels like “expanding” outwards like a bubble.

By keeping structure in your elbows, shoulders, hips, and knees, you can transfer forces from your extremities to your center. To be useful, though, you still need to establish a connection between your shoulders and your hips. This is extremely subtle, because there are lots and lots of muscles involved in stabilizing your spine, but in gross terms if you keep your back straight and your shoulders square to your hips, you’ll be in roughly the right spot to use the stabilizer muscles in your core to support external forces.

Having structure in your limbs and in your core means that you can transfer forces from one extremity to another. In practice, this normally means transferring force from your hands to your feet and vice versa. If you throw a punch, you want the force in that punch to connect to the ground so that you’re not pushing yourself away from the target. If you resist a push, you want to send that incoming pressure to the ground so that you don’t need to fight it with your muscles.

How do you learn to do all of this? That’s tricky, but there are drills that can help. The best and most “straightforward” drill (quotes because it’s not in the least straightforward except when compared to other structure drills…) is standing. I’ve talked about this before, but this time I’ll try to explain how to do it. Understand that this is extremely subtle; it’s the sort of thing you need to just do for a while before it will start to make sense to you, but it’s a lot better with a teacher who can guide you.

First, put your feet about shoulder width apart. Bend your knees. Point your tailbone down by rolling your hips slightly forward. Stack your spine vertically on top of your pelvis and pull your chin back slightly so that your spine is holding up your head rather than your neck muscles. Make sure your shoulders are back and down, and raise your hands so they’re in front of your shoulders, with palms towards your chest. Bend your elbows so that your arms form a rough circle, like you’re holding a beach ball. Let your elbows droop a bit, but don’t let them fall all the way.

Now, pay attention to the tension in your body. What you want is equal tension across your whole body; when you do it right, it feels like you’re a single solid unit but still springy, like a solid rubber doll. Activate your quads, like you’re pressing yourself away from the ground. I like to use the image of a weight sitting on top of my head, and I’m resisting the force of that weight by pressing with my legs. Feel the beach ball in your arms expanding, and resist the expansion by pulling your hands together. Feel the backs of your hands wanting to move away from your shoulderblades, and your elbows wanting to spread apart, and resist that force using the minimum amount of tension that will do the job.

Stand there for a while. Eventually, things will start to hurt, and things will start to tremble. The probable points of failure are your quads and your deltoids; for the former, figure out how to relax your legs while still holding yourself off the ground, and for the latter, figure out how to relax and drop your shoulders without letting your arms fall. You can move slightly within the posture, like a tree swaying in the wind, but this complicates things so I recommend against it at first. Trembling muscles, by the way, does not mean that they’re about to fail completely, even though that’s what it feels like. You can stand there with your legs shaking for quite some time, it’s just not pleasant to do.

That’s the problem with standing – it’s not at all fun. It’s painful and often boring, and so people generally don’t do it very much. It’s also the sort of drill that you have to do for a while before you start seeing benefits, so while I teach it to all of my students eventually, I don’t really push it except for the few who are serious about improving their abilities.

More advanced structure drills add movement. The simple form of these are called shi li or “silk reeling” drills and just use a back-and-forth movement of some sort. The traditional version, as I learned it, puts you in a diagonal stance with one foot leading and has you “pull” your weight forward and “push” it backward with your hands. In other words, you’re pushing and pulling with your hands and shifting your weight opposite the push, so your hands stay relatively stationary and your weight moves from foot to foot. The trick in these drills is to maintain constant structure throughout the entire movement, especially in the transitions at either end. This is much more complicated than I can reasonably describe in a blog post – if you get this far, go find yourself a teacher.

Structure is absolutely key to every martial art. Without it, you can’t exert power, and you can’t resist forces from outside. Not every art actually acknowledges the concept, though, and most of them don’t seem to really study it as a topic and figure out how to maximize it. I’m very grateful for the work that I did on the internal arts, where structure is a primary component, because it’s a fundamental skill that improves my performance in every art that I practice.

Categories
general movement

Principles of Power

With thanks and apologies to Sifu Mark, who taught me all this stuff.

When I was training Wan Yi Chuan kung fu, Sifu taught that power generation has five components:

  • Mass towards target
  • Wave-like motion
  • Crack the whip
  • Towards, through, past
  • Drive your intent

Understand that this is one perspective on power generation – every art effectively uses all of these components, but different arts think about them in different ways. The purpose of this post is to lay out my understanding of these components, how they interact, and how they contribute to particular movements.

To be clear, every movement incorporates all of these sources of power to a greater or lesser extent. You might do them badly, even so badly that the net effect is negative (such as striking forward while moving backwards), but they’re always there. The power in your movement is the combination of the contributions from each component, and the amount of each will vary depending on the movement and the circumstances.

Sifu, if you ever see this, feel free to tell me all the ways in which I’m wrong in the comments.

Mass towards target

This one is simple: kinetic energy equals mass times velocity squared. If you want to hit something hard, throw as much mass at it as you can, as fast as possible. When you throw a punch, ideally you should step into the punch so that your entire body mass is moving at the moment of impact.

Wave-like motion

The internal arts teach that all human motion is reciprocal. In order to go down you must go up, in order to go forward you must go back. Many of those motions end up being internal, but they’re no less real for it. When you step forward, there’s a rising-then-falling component to the movement even if your center of mass doesn’t physically change its distance from the ground. That falling component incorporates the force of gravity, so you can use it to increase the power of your movement.

This is true for all movements that exert force, but it’s most obvious if you look at a downward strike such as the pi quan strike in Xing Yi. As you “fall” onto your front foot, the structure of your torso and arm translate that momentum into your strike. With proper timing, you can add this power to all the other sources discussed here.

Crack the whip

This is a concept I’ve seen called “staged activation”. The idea is that each joint is attached to muscles that can create power in that joint. If you want to maximize your power the best thing you can do is to activate each of those sets of muscles in sequence so that each can add their power to the movement. The longer the distance over which you can do this, the more joints are involved and the more power you can generate.

Let’s look at a movement like a full-arm slap. I’m specifically not using a punch here because it’s a bit more complicated – in particular, I disagree with the idea of moving your hand last when you’re punching, but that’s beyond the scope of this post. In order to execute a slap with maximum power, you would start at the foot pushing away from the ground, turn the knee, then the hip, then the shoulder, then the arm (without letting the arm move outside of the zone of structure, of course).

By staging the activation of your body in this way, the power builds as it moves from joint to joint. If you time it correctly, it reaches a maximum at the moment of impact and is added to the power from each of the other sources.

Towards, through, past

This is standard advice in every boxing class: “punch through your target”. All the stuff above talks about focusing your power to a specific instant in time, which is also a specific point in space. The idea with this principle is that you don’t want that point to be on the surface of your target, or you’ll expend your energy there and not be able to penetrate – you want to focus your energy within your target so that the energy will be fully transferred.

How deep within the target is a matter of some debate, and it depends on what kind of strike you’re talking about. A short snappy strike like a jab certainly wants to be pretty close to the surface, while a committed strike like a cross should be farther inside. For something like a stomp kick (also called “heel kick”), you might even want it to be beyond the target. Go too far beyond, however, and you lose the focus of your strike; it’ll turn into a push, with no real sharp impact.

Sidebar: there is a concept in Chinese internal arts called fa jin. This has to do with focusing the power of a strike into an extremely small area and then releasing it into a target. This style of striking deliberately focuses a strike close to the surface of a target and relies on the shock wave generated within that target to carry the energy beyond the point where the strike actually ends. This is the secret to the so-called “one-inch punch” – by using all of these principles, it’s possible to generate a lot of power in an extremely small space and to deliver that power beyond the reach of your actual fist.

Drive your intent

To this point, everything has been about the shape and timing of the movement. This one is about your mental state, but of course it has to translate into the physical in order to result in a change in power. The idea here is that you have to intend to hit and to hit hard. If your intent is to strike to the target, that’s what you’ll do. You have to put your mind on the other side of the strike, both in space and in time (that is, both “past” and “after” the point of the strike), in order for the strike to arrive correctly.

I said this has to translate to the physical, so what form does that take? Primarily, driving your intent results in relaxation and lack of hesitation. If you’re striking to a target (and this is much more common than you might think, especially among people who are used to point-sparring), you’ll unconsciously start to tense the opposing muscle groups before you reach the target. For example, if you’re throwing a jab you need to keep your bicep relaxed until (just barely) after the moment of contact, and the way to ensure that happens is to drive your intent through the target.

Related to relaxation but separate, if you’re not sure about striking you may hesitate. Committing mentally to the strike removes this hurdle. You can commit to a strike without actually executing the strike – some arts refer to this as “loading”. Crane-style kung fu uses this principle and describes it (or at least it was described to me) as “leaning on a glass wall” – the idea is that you have decided to attack and you’re being held back by an invisible force. The instant the force is removed, the attack will go off and you don’t have to make a conscious decision to do it.

In kenjutsu, we practice this using an exercise called “sensitivity drills”: you lock swords with your partner, look for an opening, and try to hit it. Each person is trying to maintain a constant committed offense at every moment, so that if the obstruction of their partner’s sword is removed, their strike will occur automatically and without hesitation. If there’s a suki (gap) in your intent, your partner may be able to strike you without being struck in return, because you’ll have to make a conscious decision to move before your attack will occur.